
Windows
Download & Install
First download the STM32CubeIDE installer from our Github.
⚠️ Warning: NEVER place the PCB on top of your computer, it may kill your computer.
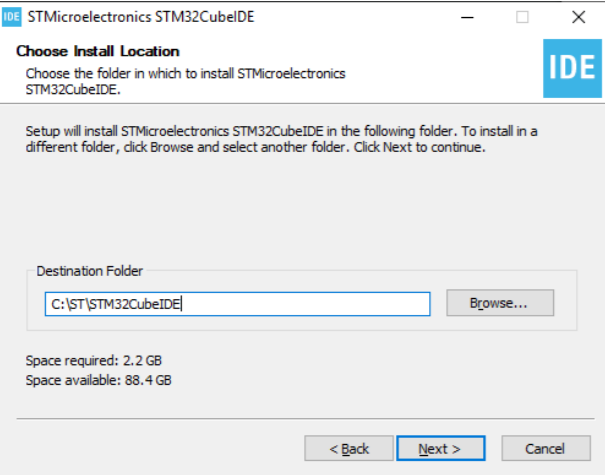
You can choose which every directory you like to place the project files. Just make sure you can find it afterwards.
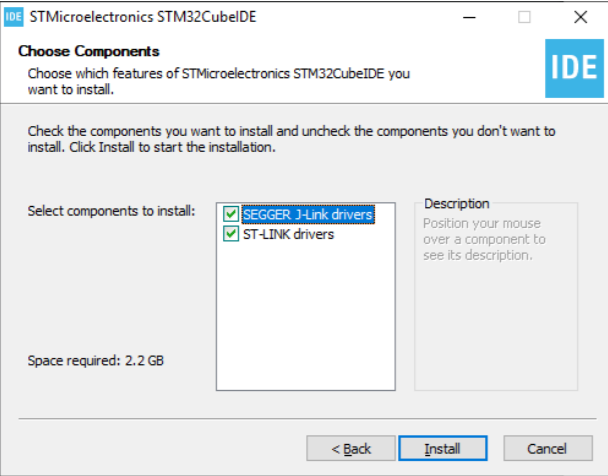
J-Link drivers is not needed in this case But definitely check the ST-link drivers cuz we need then to flash(upload) the program to the mainboard.
After you have installed the IDE, please follow the steps below to properly setup your Integrated Development Environment.
Import the project files
Download the sw-tutorial.zip we prepared for you below.
Note that we may have some library changes from time to time. So always follow what the tutorial notes say.
Unzip the
sw-tutorialand put it into any folder. (ignore the metadata)

Open STMCubeIDE 1.10.1 and you will see the following window.
You can choose whichever directory you like to place the project files. Just make sure you can find it afterwards.

Click
File->Open Projects from File System...
Click
Directoryand find the location of yoursw-tutorialfolder.

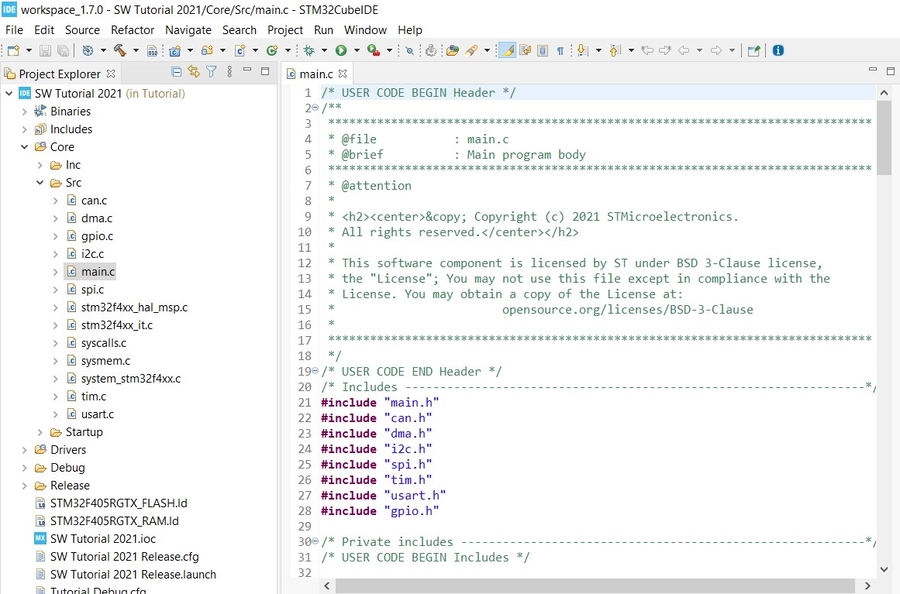
Tada! You have successfully imported the code boilerplate.
Configure ST-Linkv2 (Windows)
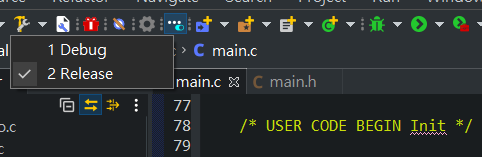
Switch build option from Debug to Release
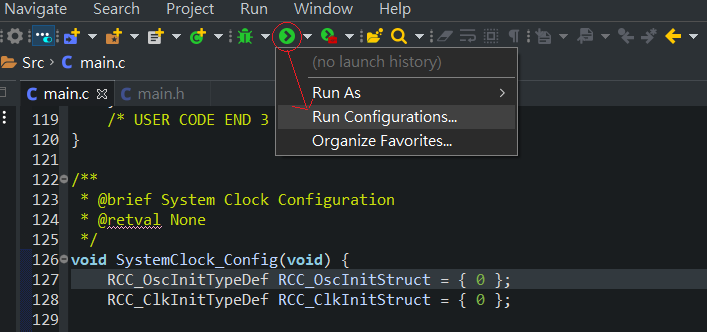
Click the arrow besides Run and click Run Configurations...
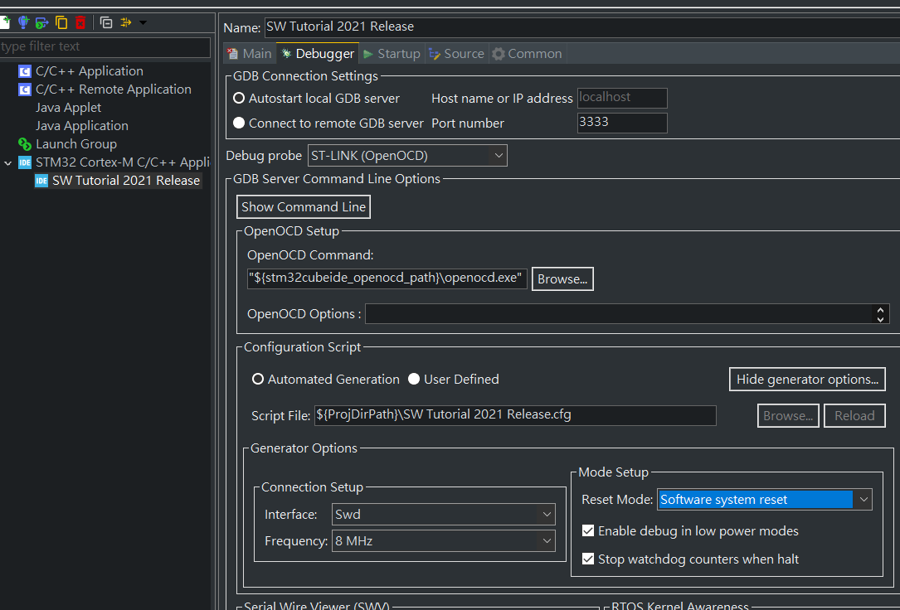
Choose STM32 Application the left and select Debugger Tab.
Change Debug probe to
ST-LINK (OpenOCD).Also change the OpenOCD Command to"${stm32cubeide_openocd_path}\openocd.exe"(Note the different\and the.exe)Click
Show generator options...underConfiguration Scriptsto reveal more options.In
Mode Setup, selectSoftware system resetinReset Mode.
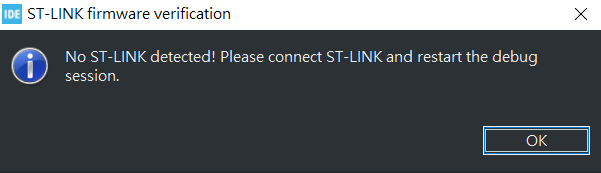
If you see this, you should be good to go. Ask someone to give you a mainboard and a ST-LINK (the USB like thingy we use to flash code onto the board) and see if it works.
Last updated